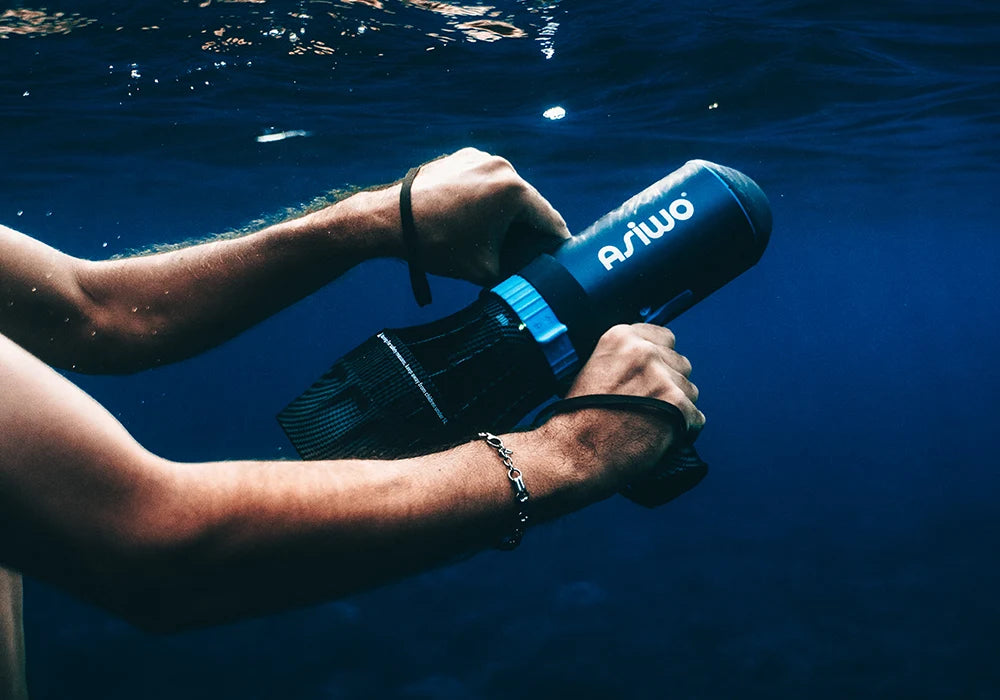


To rinse and dry a diver propulsion vehicle properly, wash it with clean fresh water after every dive, clear salt and sand from the propeller and drive area, drain trapped water, wipe the exterior, dry openings carefully, check seals, and store it only after the unit is fully dry. Battery covers, charging ports, O-rings, and propeller guards need extra care because small amounts of salt, sand, or moisture can cause bigger problems over time.
A DPV works in saltwater, sand, silt, boat spray, and wet gear bags. Even if the unit is built for underwater use, it still needs basic post-dive care. Poor rinsing can leave salt around buttons, screws, seams, and battery areas. Poor drying can trap water near seals or contacts. Over time, that can lead to corrosion, stiff controls, leaks, reduced thrust, or battery issues.
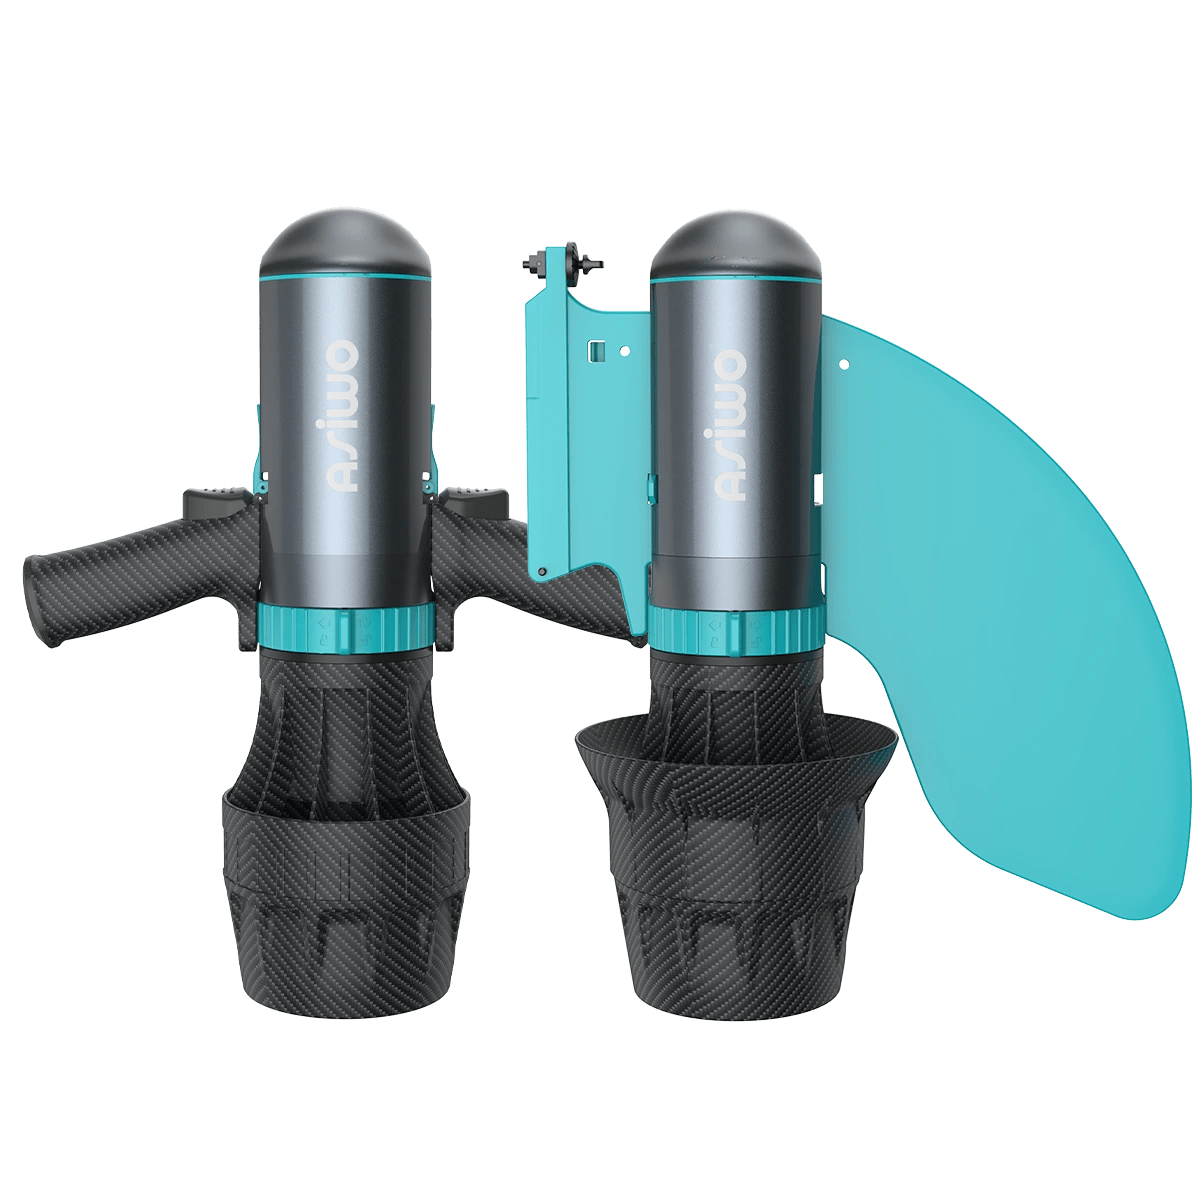
This guide covers how to rinse a DPV after use, which parts need extra attention, how to dry it safely, and what to check before storage.
Why Does Proper DPV Rinsing Matter?
Proper DPV rinsing matters because a diver propulsion vehicle has moving parts, seals, electrical areas, and small gaps where salt, grit, and moisture can collect. Rinsing is not just about making the scooter look clean. It helps protect the propeller, drive system, buttons, battery area, O-rings, screws, handles, and charging points.
Saltwater diving is especially harsh. After a dive, salt can dry into crystals on the surface and around tight areas. Sand from a shore entry can hide inside the propeller shroud. Silt from the bottom can settle around moving parts. If the DPV is packed away wet, moisture may sit against metal parts and seals for hours or days.
A proper rinse and dry routine is useful for:
- Saltwater dives
- Shore entries with sand
- Boat dives with spray and deck grime
- Cave, wreck, or silty dives
- Travel days when the DPV goes into a case or bag
- Long storage between dive trips
The goal is simple: remove what should not stay on the DPV, then dry the areas where trapped water can cause trouble.
Salt Can Leave Residue
Saltwater does not disappear cleanly after a dive. When it dries, it leaves salt residue around seams, screws, buttons, battery covers, trigger areas, and the propeller housing. That residue can make parts feel stiff, attract more moisture, and increase the chance of corrosion on exposed metal parts.
Even a quick rinse is better than leaving salt on the unit overnight. If the DPV was used in seawater, rinse it the same day whenever possible.
Sand Can Affect Moving Parts
Sand, mud, seaweed, small shells, and fishing line can collect around the propeller, nozzle, intake, shroud, and drive unit. Some debris is easy to see. Some hides behind the propeller guard or inside narrow channels.
If debris stays there, it can reduce thrust, create vibration, make the propeller work harder, or damage nearby parts. A diver propulsion vehicle depends on smooth water flow, so the drive area deserves more attention than the outer shell.
Moisture Can Cause Problems
Moisture is normal after a dive, but trapped moisture is the problem. Water can sit around battery covers, charging ports, contacts, seals, handle joints, screw heads, and soft cases. If the DPV is stored before it dries, that moisture stays in contact with sensitive areas longer than necessary.
Drying is especially important before opening any battery compartment. If the outside is still wet, drops can run into the battery area when you remove a cover or cap.
How Should You Rinse a DPV After Every Dive?
Rinse a DPV with clean fresh water as soon as practical after each dive. Start with the outer body, then focus on the controls, seams, battery cover, and propeller area. Use a gentle water flow instead of blasting high pressure into buttons, ports, or openings.
If you are on a dive boat, a freshwater rinse tank may help, but it is not always enough. Shared rinse tanks can contain salt, sunscreen, sand, and gear residue by the end of the day. If possible, give the DPV a more complete rinse later with clean running water.
A simple post-dive rinse order works well:
- Turn the DPV off and secure it.
- Rinse the outer body with fresh water.
- Work fresh water around the handle, trigger, buttons, seams, and latches.
- Flush the propeller and shroud area.
- Check for debris before drying.
- Drain and wipe the unit before storage.
Do not open battery areas, charging covers, or sealed compartments while the outside is dripping wet unless the manufacturer specifically instructs you to do so.
Use Clean Fresh Water
Fresh water helps dissolve and remove salt before it dries. Use a hose with low to moderate pressure, a shower rinse, or a clean bucket of fresh water. Avoid forcing strong water pressure directly into openings, seams, buttons, vents, charging areas, or control panels.
For saltwater use, a longer rinse is better than a quick splash. Give fresh water time to reach the places where salt collects. Rotate the DPV while rinsing so water reaches the underside, handle area, propeller shroud, and rear housing.
Rinse the Body First
Start with the main body because it carries salt spray, sunscreen residue, sand, and boat grime. Rinse the nose, shell, handle, trigger, latches, screws, display area, battery cover, and seams.
Pay attention to small edges. Salt and sand often collect where two parts meet. A soft cloth or soft brush can help clean around textured surfaces, screw heads, and handle joints. Do not use a wire brush, harsh cleaner, bleach, or abrasive pad.
Flush the Propeller Area
The propeller area needs the most careful rinsing because it pulls water, sand, and debris through the drive path during use. Flush the propeller, nozzle, shroud, intake area, and rear housing with fresh water.
Before touching this area, make sure the DPV is powered off and cannot start accidentally. Do not put your fingers near the propeller unless the unit is safely disabled according to the manual.
Look for:
- Sand packed into corners
- Seaweed or grass
- Fishing line
- Small stones
- Shell fragments
- Hair or string
- Mud or silt buildup
If you see debris that does not rinse away, remove it gently only if the manual allows access to that part. Never force the propeller or pry against delicate parts.
Which DPV Parts Need Extra Cleaning?
The propeller, drive unit, seals, O-rings, and battery area need extra cleaning attention because they affect thrust, sealing, and electrical safety. The outer shell can look clean while these areas still hold salt, sand, or moisture.
This step is not a full repair session. It is a careful post-dive check before the DPV dries and goes into storage.
Propeller and Drive Unit
The propeller and drive unit create thrust, so they need clear water flow and smooth movement. After rinsing, check the drive area from different angles. Spin or inspect the propeller only if the manual says it is safe to do so and the unit is fully powered off.
Signs that the drive area needs more attention include:
- Reduced thrust during the dive
- Vibration or unusual noise
- Grit visible in the shroud
- Seaweed or fishing line around the propeller
- Sand falling out while rinsing
- Propeller movement that feels rough or blocked
If the DPV uses a removable propeller cover or guard, follow the manual before removing it. Some parts are designed for user cleaning. Others should not be disassembled casually.
Seals and O-Rings
Seals and O-rings help keep water out of the DPV body and battery area. After rinsing and before storage, inspect visible seals for sand, hair, grit, cracks, flattening, twisting, or cuts.
A small grain of sand on an O-ring can create a poor seal. Hair, lint, or dried salt can also interfere with sealing surfaces. Wipe accessible seals with a clean, lint-free cloth if the manual allows it.
Do not stretch O-rings unnecessarily. Do not apply random grease or oil. Use only the lubricant type recommended by the manufacturer, and apply it lightly. Too much grease can attract sand and dirt.
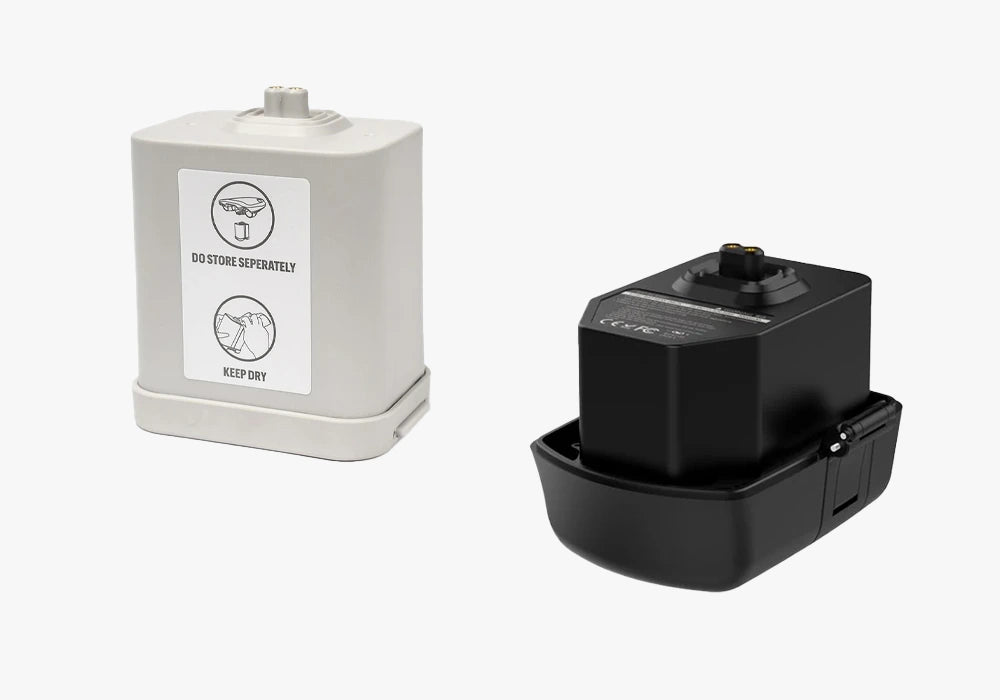
Battery Area
The battery area needs careful handling because water and electrical contacts do not mix. In normal care, the battery compartment, charging contacts, and ports should stay dry unless the manual gives specific instructions for cleaning or flood recovery.
Before opening any battery cover or charging cap:
- Dry the exterior first.
- Hold the DPV so water does not run toward the opening.
- Wipe around the cover or cap.
- Check for water droplets near seams.
- Open slowly if the manual requires battery removal.
If water appears inside the battery compartment, stop using the DPV. Remove the battery only if it is safe to do so, dry the area according to the manual, and inspect for seal failure. Do not charge a wet battery, wet contacts, or a DPV that may have leaked.
How Do You Dry a DPV the Right Way?
Dry a DPV by draining trapped water first, then wiping the exterior, then drying open areas gently. Do not seal the unit in a bag or hard case while it is still wet. Drying prevents water from sitting around seals, screws, controls, charging covers, and the propeller housing.
Rinsing removes salt and grit. Drying reduces the time moisture stays on the unit. Both steps matter.
Let Water Drain Out
After rinsing, position the DPV so water can drain from the propeller housing, handle area, tail section, shroud, and exterior pockets. Rotate it slowly to release trapped water from different angles.
Set it on a stable surface where it cannot roll, fall, or hit the propeller area. Avoid leaving it in direct hot sun for long periods, especially with batteries installed. A shaded, ventilated area is better for normal drying.
Give the DPV enough time to drain before wiping it. If water keeps running out of the propeller housing or handle area, keep rotating and draining until it slows.
Wipe the Exterior
Use a clean soft towel to remove water from the shell, handle, trigger, display area, seams, latches, screw heads, battery cover, charging cover, and propeller guard.
A microfiber towel works well because it absorbs water without scratching the surface. For tight areas, use a dry lint-free cloth. Avoid paper towels that shed fibers around seals or contacts.
The exterior does not need to be polished. It needs to be dry enough that water will not drip into openings when you move, open, or store the DPV.
Dry Open Areas Gently
Some DPV areas hold water even after wiping. The propeller shroud, handle joints, trigger area, latches, and charging cover edges may need extra time to dry.
If the manual allows compressed air, use it gently and from a safe distance. Do not blast high-pressure air into sealed electronics, battery contacts, buttons, or pressure-sensitive parts. Strong air can push water deeper into places where it should not go.
For most users, air drying in a shaded, ventilated place is safer than aggressive drying methods. Leave covers open only if the manual recommends it and the area is protected from dust, sand, and splashing water.
What Should You Check Before Storing a DPV?
Before storing a DPV, check for leaks, trapped water, battery safety, seal condition, and remaining debris around the propeller. The unit should be clean, dry, powered off, and stored in a dry place.
This check matters most when the DPV will sit unused for days, weeks, or months.
Inspect for Leaks
Water inside the body, battery tube, electronics area, or sealed compartment is not normal. If you see water where it should not be, stop using the DPV until the cause is found.
Leak warning signs include:
- Water inside the battery area
- Fogging inside a display or lens
- Corrosion on contacts
- Moisture under a sealed cover
- Unusual power behavior
- Water dripping from areas that should be sealed
- A damaged or dirty O-ring
Do not treat a leak as a simple drying issue. A DPV that has taken in water may need inspection, seal replacement, or professional service.
Remove or Secure Batteries
Battery handling depends on the DPV model. Some units should be stored with the battery removed. Some need the battery disconnected. Others have specific charge-level rules for storage.
Follow the manual for your model, especially for lithium-ion batteries. As a general habit, avoid storing a DPV with a wet battery compartment or wet charging contacts. Do not charge the battery until the battery, charger, and connection points are fully dry.
For longer storage, many battery-powered devices should not be stored completely empty or fully charged for long periods. Check the manufacturer’s recommended storage charge range.
Store It Dry
Store the DPV in a dry, shaded, stable place after it has fully dried. Avoid sealing moisture inside a bag, case, trunk, or gear bin right after rinsing.
A good storage spot should be:
- Dry
- Cool to moderate in temperature
- Away from direct sunlight
- Away from salt spray
- Away from fuel, solvents, or harsh chemicals
- Safe from falling, rolling, or heavy gear pressure
If you use a hard case or travel bag, leave the DPV out until it is dry. Cases protect gear during transport, but they can also trap moisture if the scooter is packed too soon.
What DPV Care Mistakes Should You Avoid?
The most common DPV care mistakes are storing it wet, ignoring the propeller area, opening battery covers too soon, using too much pressure, and treating all models the same. These mistakes are easy to avoid with a simple rinse-and-dry routine.
Storing It Wet
Storing a DPV wet can trap moisture around screws, seals, controls, battery covers, and propeller areas. A wet soft bag can make the problem worse because it keeps moisture against the unit.
After a dive trip, unpack the DPV when you get home. Do not leave it in a closed case overnight if it still feels damp.
Ignoring the Propeller
Many people rinse the outer shell but forget the propeller and drive area. That is a problem because the propeller area collects the most sand, seaweed, and grit.
A clean-looking DPV can still have debris inside the shroud. Always check the rear or drive section before drying.
Opening It Too Soon
Opening the battery area while the DPV is still dripping can let water run into places that should stay dry. This is especially risky after boat dives, rainy transport, or rinsing with the unit sitting at the wrong angle.
Dry around the cover first. Then open the compartment only if the manual requires battery removal or inspection.
Using Harsh Cleaning Methods
Avoid pressure washers, harsh cleaners, bleach, strong solvents, abrasive pads, and random lubricants. These can damage seals, coatings, plastics, labels, or electrical parts.
Fresh water, a soft cloth, a soft brush, and proper drying are enough for normal post-dive care.
Treating Every DPV the Same
Different diver propulsion vehicles have different battery systems, seals, charging ports, propeller guards, and service rules. A small recreational underwater scooter may not have the same maintenance routine as a technical diving DPV.
Use the same basic logic: rinse, clear debris, dry, inspect, and store. Then follow your own model’s manual for battery removal, O-ring lubrication, disassembly, and long-term storage.
Conclusion
Rinsing and drying a diver propulsion vehicle properly is simple, but it needs to be done in the right order. Rinse the DPV with clean fresh water after every dive, flush the propeller and drive area, clear sand and debris, drain trapped water, wipe the exterior, dry openings gently, inspect seals, and store the unit only after it is fully dry.
Salt, sand, and moisture cause most post-dive care problems when they are left sitting on the scooter. A few careful minutes after each dive can help protect thrust, sealing, battery safety, and long-term reliability.
Always follow your model’s manual first. Battery access, O-ring care, propeller cleaning, disassembly, and flood recovery can vary by DPV design.
FAQs
Should I rinse my DPV after every dive?
Yes. You should rinse your DPV after every dive, especially after saltwater use. Fresh water helps remove salt, sand, silt, and debris before they dry around the propeller, seals, screws, buttons, and battery areas.
Can I soak a diver propulsion vehicle in fresh water?
Some DPVs can be soaked, but not all models should be handled the same way. Follow the manual for your specific unit. If soaking is allowed, use clean fresh water and avoid leaving the DPV in a dirty shared rinse tank for too long.
Can I use a pressure washer on a DPV?
No, a pressure washer is not a good choice for normal DPV cleaning. Strong pressure can force water into buttons, seams, seals, ports, or electronic areas. Use gentle fresh water instead.
Should I remove the battery before rinsing?
Usually, you should not open the battery area while the DPV is still wet unless your manual tells you to. Rinse and dry the exterior first. Then remove, disconnect, or inspect the battery only according to the manufacturer’s instructions.
How long should a DPV dry before storage?
A DPV should be dry to the touch, drained of trapped water, and free of moisture around covers, ports, seals, and the propeller area before storage. Drying time depends on the model, weather, and airflow, but it is better to leave it in a shaded, ventilated area longer than to pack it while damp.


Laissez un commentaire